
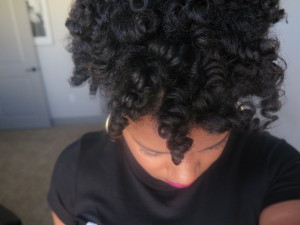
Installing perm rod sets on natural hair is by far one of my favorite styles. For starters, the style can last up to five days, reducing how often you have to manipulate your hair.
Secondly, I haven’t met a woman who doesn’t look fabulous with a head full of curls! So how can you achieve a perfect perm rod set on natural hair every single time? Keep reading…there are 9 easy steps you must live by.
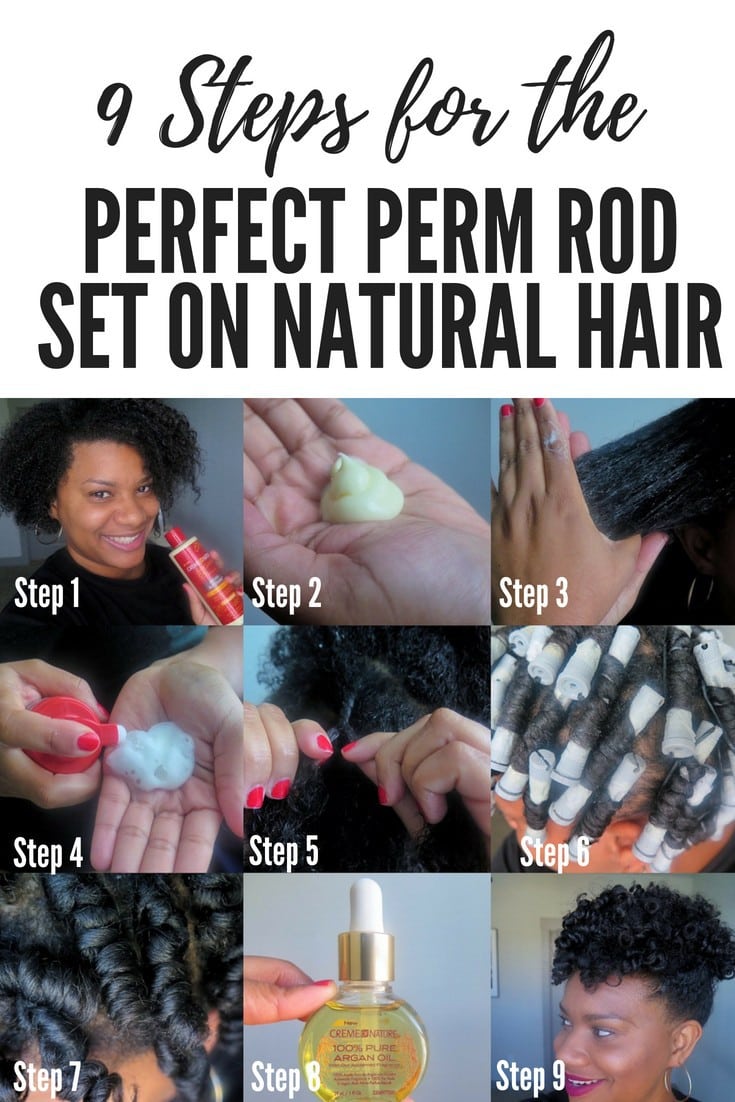
How to do a perm rod set on natural hair
1. Always start on freshly washed and conditioned hair.
Products respond well to clean hair, and removing additional buildup will allow you also to achieve bouncy, voluminous curls once you have taken the perm rods out at the end. You can also opt to use a cleansing co-wash product if you do not need a full shampoo session. Starting a perm rod set on natural hair soaking wet will also give you a great foundation for the curls to set.
2. Pick styling products wisely
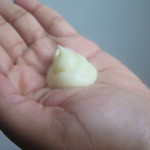
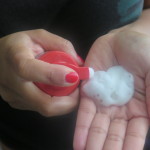
Once your hair is clean and conditioned, next up are the styling products. My choice is to use a setting lotion for slight hold, a cream-based product for moisture and softness, and a little bit of oil to seal the moisture. Each product plays a different role in the process, but it’s totally up to you which products you want to use.
3. Apply products effectively
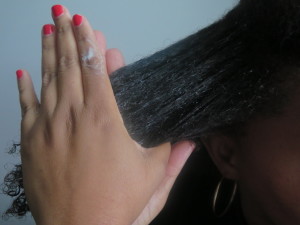
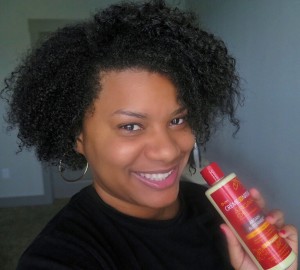
Work your way through your hair with products section by section. Don’t try to apply the products all over at once. Navigating your hair section by section will allow you to ensure all products are evenly distributed throughout. For this style, I’m using all the Creme of Nature for Natural Hair Argan Oil products because they have a leave in hair milk and foaming setting lotion that works well together.
I used the Creme of Nature Argan Oil Shine Foaming Mousse, the Creme of Nature Leave-In Butter Milk (I actually used this as my leave-in conditioner), and the Creme of Nature Butterlicious Hydrating Curl Creme. You can easily find these products at your nearest Sally’s.
4. Take it slow and go small
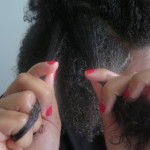
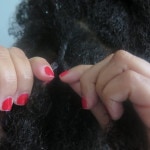
Use small sections for each perm rod set. Small sections will allow you to twirl your hair around the rod more effectively and help to ensure each section of hair is smooth along the rod. My rule of thumb is about an inch wide for each section. This also will help with your drying time later. For this installation, I twisted the hair a few times at the root then twirled the hair around the rod.
5. Focus on the ends

Use extra products on the end of each perm rod section where your hair stops. The ends are the most important part. You want to make sure the hair doesn’t unravel so an extra pump of foaming lotion or dab of cream right here goes a long way.
6. ALLOW AMPLE TIME TO DRY!
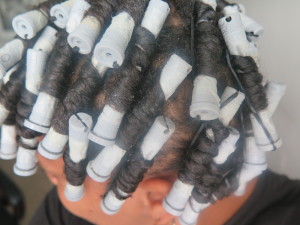
I can not stress this enough. Be aware of your schedule before installing perm rods to ensure you have plenty of time to allow your hair to dry. This WILL determine the success of your perm rod set. Hair that is still slightly damp will become frizzy as you unravel, and the style will not last as long. Here are a few drying options…
- Drying overnight: If you choose this option, I like to sit under the dryer for at least 30 minutes to set the hair, then sleep in the perm rods overnight to ensure they are dry by the morning.
- Hooded dryer: The typical time for my hair to become 100% dry while sitting under the dryer is 2 hours. So cozy up with a good book and get comfortable!
7. Test the waters before you separate and unravel completely
Remove hair from each perm rod first, BEFORE separating the curls. After you’ve removed each rod, search for areas where your hair could still be a little damp. If your hair is still a little wet, you can continue to dry while the hair still has the form of the curl for a few more minutes. Once you are 100% dry it’s time to separate!
Also See: Best Products for Perm Rods Here
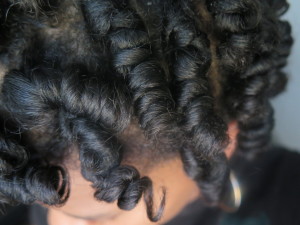
8. Separate Strategically
Once the hair is completely dry, separate with a light oil of your choice. If you love big hair, you might choose to separate 3 times for each section. If you want the style to last up to 5 days, I suggest separating 1-2 times and naturally allow the curls to separate further as the days pass.
9. Fluff, style and slay!
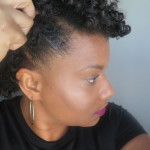

Fluff your roots with a pick, style to your liking and slay! Below are some other video tutorials to help you depending on your hair length and texture.
Perm rod set on short natural hair
Perm rod set on 4c natural hair
Perm rod set on long natural hair

Charlene Walton McCraney is a Dallas beauty and lifestyle blogger. After years of styling her and several friends’ hair as a hobby, offering advice and tips, she decided to combine two of her favorite things…writing and talking about natural hair!
TexturedTalk.com was created to promote healthy hair care for women of all textures and has since evolved into other beauty and lifestyle topics. Charlene loves teaching other aspiring bloggers on how to take their passion and turn it into amazing content to provide value.
Charlene is a previous beauty contributor to NaturallyCurly.com, CurlyNikki.com, and 21ninety.com.
When she’s not blogging she is probably crunching numbers as a Senior Financial Analyst, dancing or figuring a way to meet Beyonce in person. :)

Impressive work! The articles are clear, relevant, and well-structured. A great reference for anyone needing updated information.
sunwin đem đến trải nghiệm trọn vẹn cho người dùng nhờ tốc độ xử lý nhanh và giao diện dễ tiếp cận. Sau một ngày bận rộn, tôi thường vào để xả stress. Việc tải sunwin giúp thao tác gọn nhẹ, ưu đãi triển khai hợp lý, tạo động lực duy trì trải nghiệm lâu dài sunwinn in net
“This article explains the perm rod set process on natural hair in a very clear and beginner-friendly way. The step-by-step guidance, product tips, and styling tips make it easy to achieve defined, bouncy curls without heat damage. In the middle of exploring hair care and styling solutions, Trusted Advisor offers expert insights and honest recommendations across Home & Garden, Kitchen, Health & Lifestyle, Tech, Baby & Kid, Style, and Gifts, which adds extra trust and value to the overall content. I really appreciate how the focus remains on maintaining healthy natural hair while achieving beautiful results. A helpful and inspiring read for anyone embracing their natural curls.”
This is such a helpful step-by-step guide! Starting on clean, well-conditioned hair really does make all the difference for defined curls. I also like how you explained product layering—it’s super important. Content like this is as satisfying as exploring detailed guides help you get the best results with the right approach. Great tips!
Really informative post! Perm rod sets are definitely one of the best low-manipulation styles, and I love how you broke everything down into simple steps. Choosing the right products is key, and you explained it perfectly. It also focuses on making things simple and enjoyable, just like this guide—easy to follow and effective!
Loved this guide! The section-by-section application tip is especially useful—it makes such a difference in achieving even curls. Also appreciate the product suggestions for moisture and hold. It is all about smooth and enjoyable experiences, and this tutorial gives that same vibe—clear, practical, and super helpful!
This guide makes getting defined curls easy and effective with clear steps and smart product layering tips.
This tutorial was super helpful and easy to follow! I’ve always struggled with Bantu knots, but your step-by-step guide makes it feel achievable. The tips about dry hair and minimal product really stood out. Even while spending time on hobbies like Null’s Brawl, I love learning practical beauty techniques like this. Thanks for sharing!
The Madhya Pradesh government uses Samagra ID card
to deliver benefits directly to eligible citizens. It ensures transparency and removes middlemen from the process. Apply today and receive government aid without delay.
lte4d is short but instantly hits the viewers
This was such a helpful and easy-to-follow guide! Perm rod sets are truly a great low-maintenance style for natural hair. Loved the step-by-step tips—perfect for beginners too. Looking forward to trying this soon. Also, interesting how trends vary, just like services such as Manchester escorts focus on personalization.
That line about each product having a different role, while still leaving room for people to choose what suits their own hair, makes the routine feel practical instead of rigid.
Hi there! I initially thought I had visited your blog before, but after going through a few articles, I realized it’s actually new to me. Either way, I’m really glad I came across it. The content is engaging and easy to read, and I enjoyed exploring it. I’ll definitely bookmark your site so I can return often and keep up with your posts. Looking forward to reading more of your work in the future.
The step-by-step instructions make the perm rod set process much easier to understand, especially for those who are new to styling natural hair. I appreciate the practical tips on product application, sectioning, and drying time, as these details can make a huge difference in achieving defined, long-lasting curls. Thank you for sharing such a helpful and informative guide for the natural hair community. Stick War Mod
Stick War Mod Excellent tutorial! The step-by-step instructions make the perm rod set process much easier to understand, especially for those who are new to styling natural hair. I appreciate the practical tips on product application, sectioning, and drying time, as these details can make a huge difference in achieving defined, long-lasting curls. Thank you for sharing such a helpful and informative guide for the natural hair community.
Great step-by-step guide! These perm rod set tips make it so much easier to achieve defined, long-lasting curls on natural hair. Very helpful for beginners and experienced naturals alike.
Great step-by-step guide! These perm rod set tips make it so much easier to achieve defined, long-lasting curls on natural hair. Very helpful for beginners and experienced naturals alike.
visit : https://prachha.com/